
DIY Kayak Cockpit Cover

I love the self-reliance needed at times for the outdoors. For me this sometimes means making or altering gear.
This write-up outlines a simple way to make a cockpit cover. The main steps are:
- Select materials
- Trace a Pattern
- Cut and Buttonhole
- Hem edge
- Lace with shock cord
Time was about 4 hours - including tea breaks and time taking the pics.
Materials
I decided to use fabric I had on hand from my last business. It was lightweight, durable, water resistant-coated Cordura (I think 200) Nylon, I had purchased at a local fabric store. Or you can use just about anything if you don't want the cover to be waterproof. A rope with cord stops can replace the shock cord.
50 years of lightweight, maneuverable, high-performing kayaks.
Check out this interview with Tom Keane, Eddyline Kayaks Co-Owner, on their journey!
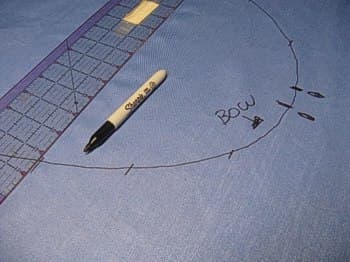
Tracing a Pattern
First, a tracing of the coaming is needed to be marked out on the fabric. So, lay the fabric good side down over the cockpit (so markings stay inside).
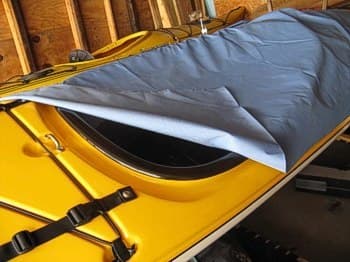
Next, wrap shock cord to make a snug fit. Leave at least 4" allowance (extra fabric) all around.
Fabric held in place with shock cord.
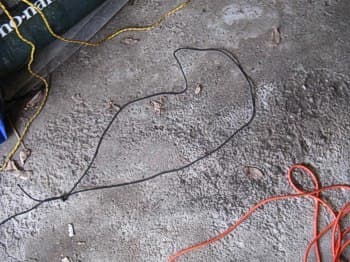
Shock cord "noose" used to hold fabric while tracing.
Next I traced the outside of the coaming onto the fabric. I used a Sharpie instead of wax pencil for the cameras sake...
Don't forget to mark the "Bow End" for reference when cutting later.
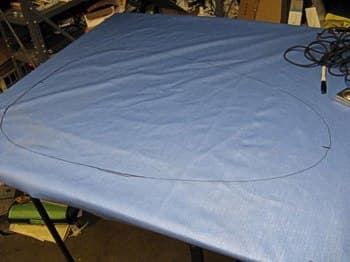
Fabric laid out on sewing table for more marking and cutting.
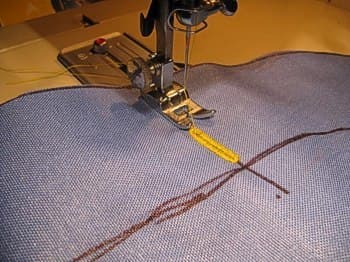
Cut and Buttonhole
This next step was fun. Using a designers curve, I made marks 3 inches away from the original tracing and connected the marks to create the cutting line (a good job can be done freehand without the tool, too). Inside this border is where the buttonholes and 1/4" final hem will be made to prevent fraying.
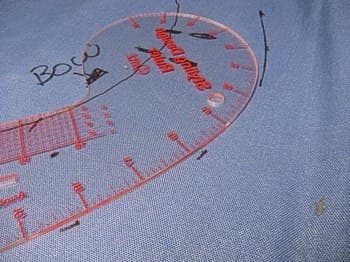
There are two curves in this pic, the one in the upper left is the cockpit tracing and the plastic tool is lined up on the cutting line.
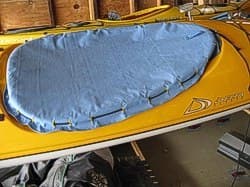
After cutting out the pattern, I made marks every several inches to spot where to add buttonholes. These locating dots for buttonholes were placed one inch away from the original cockpit tracing. I added 30 buttonholes; add more or fewer to suit your cockpit size.
Making the first buttonhole on a vintage Singer sewing maching. After sewing the buttonholes, snip them open with scissors. The buttonhole look is nice and saves making a casing.
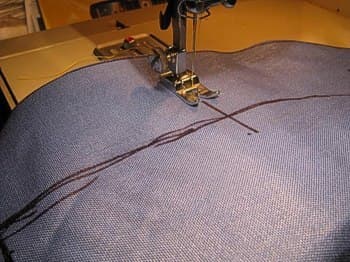
Hem Edge
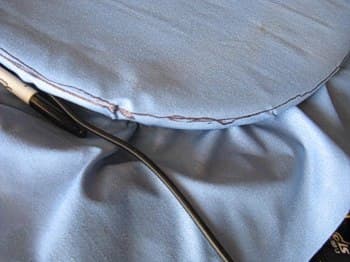
I switched to a console sewing machine to sew the 1/4" hem to prevent fraying, then threaded the shock cord through the cover.
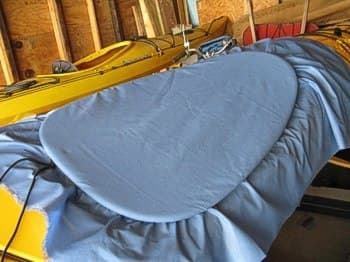
This picture is the cover being fitted, hem not yet done. The cord isn't tensioned hence the puckers...
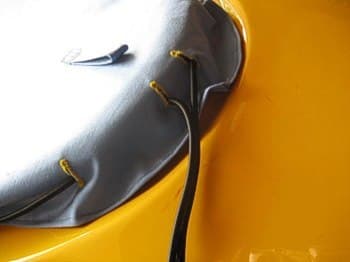
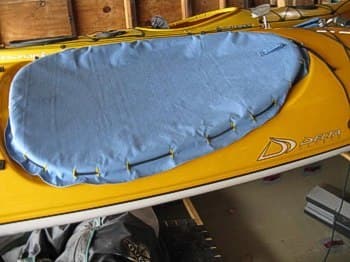
Detail of cord exits; knot not tied. I cut the cord to length later and added aglets at the ends.
Added Loop Option
Then I added a loop to the top of the cover as a pull strap.
Debra Shields is retired from a strong applied math and physics career. Her DIY articles have previously been seen by the Chagrin River Canoe and Kayak Club now known as the North Coast Paddlers "Meetup group". Besides kayaking, she likes biking, hiking, x-country skiing, distance swimming and kite flying.
Did you know this article was a Paddler's Post submitted by one of your fellow paddlers?
Submit your own epic paddling tale, paddling lesson, or helpful tip and share with the community!
Related Articles
~A Paddler's Post submitted by Gregg Jackson~ For decades I had combined the joys of hiking and…
Learn to make a good DIY stake out pole so you can save some money for other kayak updates!

I don't know about you, but I'm ready to get outside! Up until now, old man winter has been pretty kind…

7 out of 10 camera repair requests are because the camera got dropped, the other 3 are because the…