
Installing a Lining Hole in your Canoe
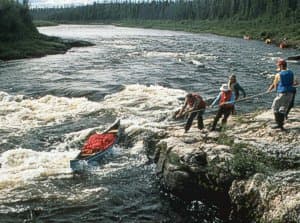
The ends of your canoe should have a fitting for the attachment of tie-downs and lining ropes. Deck-mounted ropes are fine for tie-downs, but they can cause a capsize when lining because they exert their pull above the mass of the canoe.
The safest plan is a Bill Mason style harness (see Mason's book, Path of the Paddle) that pulls right from the keel-line.
But rigging a harness at every rapid is a hassle.
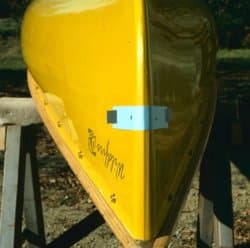
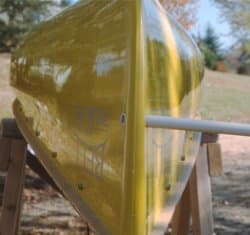
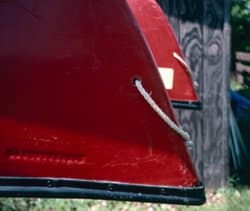
Better to install a waterproof lining hole a few inches above the cutwater point (see bottom photo).
"Cutwater" is the place on a boat where, when the boat is loaded, the surface of the water intersects the hull at the bow.
Since a typical loaded, tandem canoe draws about three inches of water at the bows, this would be the cutwater point. Thus, if the bow is say, 21 inches high, then 21-3= 18 inches, which would be the "cutwater" point. However, it's not a good plan to install lining holes this far down even though this is physically the best place for the lining ropes. Installing them at actual cutwater would result in the knot and portion of the rope being underwater much of the time. This would slow the canoe and the rope might catch on something. That's why I recommend a place about half way down the bow of the canoe. For 21 inch bows, this would be about 10 inches down. This will get the center-of-gravity low enough for safe lining, and the lines won't be submerged in water.
~Get the BWCAW Tee~
With over 1,090,000 acres of wilderness area, the BWCAW is a paddler's paradise.
Essentials:
Electric drill and assortment of bits;
Dremel tool or coarse rat-tail file,
foot long piece of one-half inch diameter PVC water pipe,
instant epoxy, scissors, paper, pencil hacksaw, sandpaper,
small pipe-reamer or cartridge-case de-burring tool.
Procedure
1. Make a paper pattern like that used to locate a door knob hole.
Tape the pattern to the canoe hull and mark the location of the hole on one side of the paper.
2. Remove the template and fold it in half. Punch a hole through the place where you've marked the lining hole.
Then, tape the template back on the canoe (photo). You have now accurately located the hole position on both sides of the canoe.
3. Drill a one-eighth inch diameter hole through the canoe at each mark. Drill from each side until the holes meet (photo). This procedure will ensure equal centering of the holes
4. Use a three-eighths inch diameter bit to enlarge the hole. Again, drill into the hull from each side

5. Use a Dremel tool or rat-tail file to enlarge the hole (from each side) to accept the half-inch diameter PVC pipe. Work slowly; frequently try the fit of the pipe. DO NOT use a larger drill bit to enlarge the hole at this point!
Doing so will break out gel-coat (or vinyl in the case of a Royalex canoe) that will be difficult to repair.
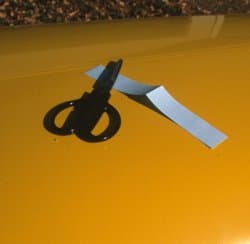
6. Insert the pipe into the hole (photo). Trim and sand it so that the ends perfectly match the contour of your canoe
7. Epoxy the fitted section of pipe into the hull.
Later, chamfer the insides (i.e. cut at an edge added for a finished appearance and to break sharp edges) using a pipe reamer or cartridge case de-burring tool.
Paint the fitting to match the hull (photo), if you prefer.
Cliff Jacobson is a professional canoe guide and outfitter for the Science Museum of Minnesota, a wilderness canoeing consultant, and the author of more than a dozen top-selling books on camping and canoeing. www.cliffcanoe.com
Related Articles

We’ve all been there before. All through the cold months we dream of putting the heavy coats and extra…
The PFD, or life jacket is your single most important piece of safety equipment. You need to choose one…

My dad was a quality control engineer. A sign in his office read: "Accidents don't just happen; they…

Sailing a canoe, the act of being propelled across a large lake or wide river, can be absolutely…