
DIY: Handy Tie-down Loops
Remember the ‘good old days’ when there were at least two or three places along the front and back of your car where you could loop a line around a bumper strut or through a conveniently placed slot in the frame to tie down a canoe or other roof load? Such attachment points made it possible to use practically any size line to hold down a payload.
"Bumper struts? What’s a bumper?" You’re not likely to find the old fashion bumper on most of today’s molded, one-piece body/chassis vehicles. Even pick-up trucks are being snazzed up to the point it’s hard to find tie-down spots on some of the models. If you are lucky enough to find an opening through which to thread a tie-down line, it’s usually only after you’ve squirmed around on your back, under your vehicle. These points typically require you to have at least 3-4 feet more line than usual just to tie it off with a secure knot. Clearly, today’s sleek auto bodies and newer construction techniques limit the opportunities to even find an adequate anchoring point.
So why not just make your own? We add D-rings to rafts, cleats to kayaks and manage to put an anchor point right where we need it (if the manufacturer hasn’t already done so). With just a few pieces of hardware and some 1" nylon tube strapping, you can make handy – and secure – anchor loops for most any vehicle in a matter of minutes. These loops are strong enough to secure most gear and are especially handing for adding security lines for a roof-loaded kayak, canoe and other similar loads.
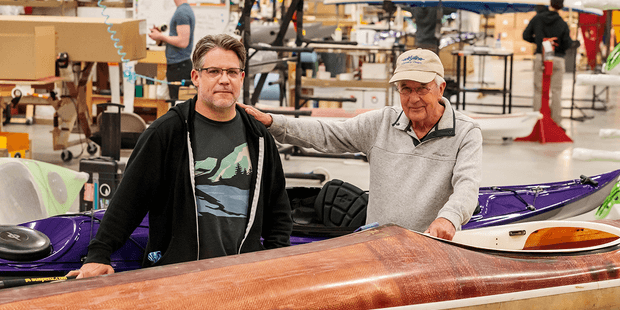
50 years of lightweight, maneuverable, high-performing kayaks.
Check out this interview with Tom Keane, Eddyline Kayaks Co-Owner, on their journey!
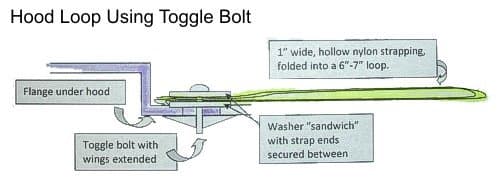
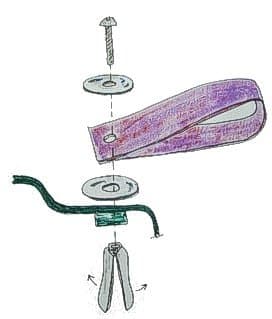
 You’ll need either a point on the flange along the inside edge of the vehicle’s hood where there’s a bolt at least 1" in length or an opening in the flange where you can attach a bolt with a toggle wing nut. The only other "hardware" you’ll need will be a couple of washers sized appropriately for the bolt, and when necessary, one washer relative to the size of the opening against which the toggle bolt will be secured.
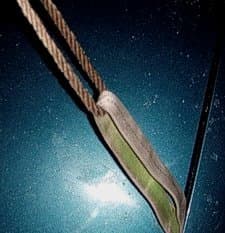
The other key element to make the loops is a piece of 1" nylon tube strap about 10-12" long. When folded in half, it must be long enough to be secured to the vehicle, extend out beyond the closed hood about 4-6", and long enough to form a loop through which a line can be passed. I’ve always only used the tube type of strap (basically 1" strapping that is simply a flattened tube made of nylon - a double thickness of nylon). Thinner, one-ply strapping could work but since my tube loops have lasted over ten years with absolutely no maintenance at all – go for the 2-ply.
The challenge is to find a place under the hood – or back hatch – where you have larger bolt heads and enough room to work and add about 1/4" of thickness without compromising the closure of the hood, or any other operations.
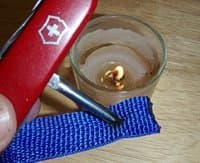
I use a heated Phillips screwdriver tip to burn a small hole centered in the middle about 3/4" up from each end of the strap. These holes should be only slightly smaller in diameter than the diameter of the attachment bolt you’ve selected as the tie-down point.
 You will need a few washers to make sure you can compress the strap down to the surface of the bolt head. If the bolt is not self-tapping, I’ve used a toggle bolt, one strong enough to hold its share of the pull from the line.
Basically you are looping the nylon strapping, aligning the holes melted into the ends and threading the attachment bolt through the holes. The bolt is re-fastened to the point where it compresses the nylon strap, cinching the loop in place. By installing such a loop on each side of the hood, you basically have the lines in the same location they’d be if attached down to bumper struts.
You can use this loop attachment system anywhere there is an exposed bolt head. Just remember to check for strength and that there will be no fraying or excessive wear. When not in use, they can be folded back down under the hood until needed again. Prolonged exposure to UV rays will eventually weaken them, as will small cuts and tears. Another concern is the constant whipping motion against your hood if exposed but not being used to secure a load. Even though its soft nylon, that constant whipping in one spot could blemish your paint job.
These loops last many seasons and are as easy to replace as they are to attach in the first place. They can be applied anywhere there is a need or opportunity for a tie-down hold.
Tom Watson is an avid sea kayaker and freelance writer. His books, "Kids Gone Paddlin" and "How to Think Like A Survivor" are available on Amazon.com.
Related Articles

After listening to hundreds of paddlers expressing their kayak-related injuries, I have determined the…

Whether you've ever had to portage a kayak any distance or merely move it up the beach from water's edge…

Experienced wilderness canoe trippers know that small errors can cause big problems. In my previous…

Boats are like potato chips. It's mighty hard to stop with one. Sometimes the home fleet expands to meet…