Compass Basics for Kayaking
A discussion on the use of a compass from a kayaking standpoint begins with basic compass savvy and then advances to the difference between land compasses and maritime compasses. As kayakers we can find applications for each as we tour open waters and explore the country beyond distant shore. Even in an age of satellite tracking, GPS technology, and other advances, having basic compass skills should be part of every paddler’s overall skills resume.
Because the earth spins on an axis, a magnetic field is created, one that flows from pole to pole. The pole at the top of the world is north; the one at the bottom is south. A thin strip of metal is attracted to that magnetic flow. Allow it to swing, float or rotate freely and one end of that metal strip will align itself with that flow causing the "needle" to point north.
There is a glitch. The point on the globe around which the north axis spins is considered the geographic North Pole, the top of the world. The problem is the "magnetic" north - that imaginary northern point on the globe where the needle points (where those magnetic flow lines converge at the pole) - is not exactly at that same axis point. The earth doesn't spin exactly vertical, it's titled a bit - about 23 degrees off of vertical. This causes the earth to wobble a bit as it spins, like a top. That tilt changes slightly every year causing the "magnetic" pole to shift. It actually moves around in an erratic course somewhere below the actual geographic North Pole. The amount of change or shift each year is marked on the compass rose printed on charts.
Pause with this information for a second and consider the compass.
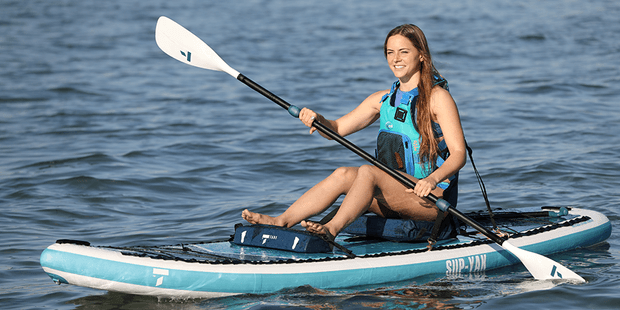
TAHE 10'6 & 11'6 SUP-YAK Inflatables
2-in-1 Kayak & Paddle Board complete packages for single or tandem use.
The Compass Dial
The most basic of compass knowledge tells us that it's a device that shows us where North is - and subsequently East, South, West and points in between -three hundred and sixty points to be exact. The compass face or dial is divided into 32 equal segments of a full circle. The next basic division after the four key directions split each in half giving us NE, SE, SW and NW respectively clockwise around the compass. Those are broken down in half again and designated by NNE, ENE and so on around the dial. One more division again and the 32 points have been established.
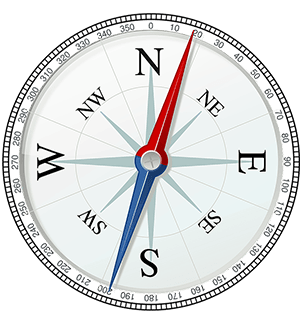
A degree value, based on a full circle of 360 degrees corresponds to each of those compass points. North, of course is 360 degrees (or 0 degrees), followed by 90 degrees/East, 180 degrees/South and 270 degrees/West. Divide the amount of degrees between each quarter to give you the values of NE 45 degrees, SW (135 degrees) and so on. The degree reading is called the azimuth. An azimuth of 270 is the same as West. It's reciprocal, minus 180, is, of course, East - half way around the full circle of 360.
Now back to the relationship of magnetic north and true north. A compass doesn’t point exact to the true north, it points to the magnetic north. At sea that difference is called "variation." On land one refers to that difference as "declination." In either case the term refers – in degrees - to the difference between true north and magnetic north.
This minor discrepancy wouldn't be so bad if that difference was uniform around the world. But, no, variation/declination varies by over twenty degrees depending upon where you are taking your reading. Remember those compass points? 360 /0 represents north, magnetic north. At this reading, the compass arrow points to that magnetic pole. The further west you go, the further east is the magnetic pole reading from the actual true (geographic) north. It's just the opposite traveling east. There is an imaginary line that, as of 2021, runs roughly from New Iberia, Louisiana to Littlefork, Minnesota where that difference is zero - the compass needle is aligned with both true north and the magnetic north.
For those inclined, you can calculate the current magnetic declination on the National Oceanic and Atmospheric Administration website.
Mapmakers long ago decided that all maps should be oriented to north – geographic north. Today maps and charts are printed so the top of the page is true north. One aligns the map and compass accordingly and thus navigates using those tools. That's great if you are standing on that Wisconsin-Florida line we talked about. If you are in Minnesota, you are about five degrees west, by the time you reach parts of Alaska, you're way into double figures.
A good map is printed with a compass "rose" that will tell you what the "declination" is for the area covered. You can then adjust your compass accordingly, literally "tuning" it in to the proper adjustment that adds or subtracts degrees. This way the compass is altered to compensate for that difference and point to the true north as shown on the map or chart. We’ll discuss applications of this later, for now, let’s get the concepts in order.
Land Compasses
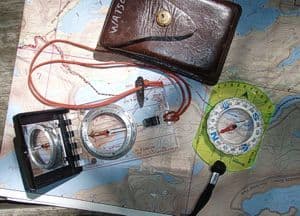
Now’s a good time to talk briefly about the different kinds of land compasses out there. Most are basically the compass dial housed in a sturdy casing. Sometimes that casing is mounted on a flat piece of clear material (plastic, acrylic) that is etched or inscribed with a rule (for measuring scale) and a direction-of-travel line or arrow. Details can be read through the base of the compass when it’s lying on the map.
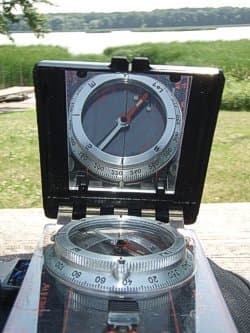
Some compasses have a hood that pivots upward revealing a sighting mirror on the underside. A "V" sighting notch is used to line out a distant landmark, the mirror is angled so the user can sight along this line, see the compass and read the bearing on the compass dial.
The most important task for a user of a land compass is to make sure the compass has been re-calibrated for the local declination. You can always mentally add or subtract those degrees but having that difference tuned into the compass is much handier.
A Practical Example
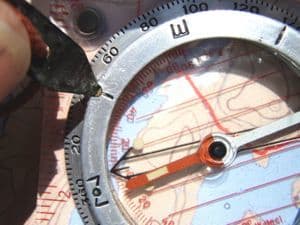
Let’s show a practical example of all this: You know that your destination is 57 degrees (a little further East than NE, right?) from your location. The declination in that area is 12 degrees. This means that the compass needle will point 12 degrees further east than the geographic North Pole. In order to stay on course by following your compass needle you need to adjust that needle to compensate for those 12 degrees. The declination correction is usually a small screw on the side of the compass dial. Turning it 12 degrees east of the 360 degrees/0 degrees mark re-calibrates the compass so the needle now points to the geographic north. Now you can follow your bearing of 57 degrees without any further compensating for declination, it’s now included in your readings.
Helpful Tips When Plotting a Course
Helpful tips when plotting a course - Applications of this knowledge come into play whenever you strike out across unfamiliar territory (exploring inland from an unknown beach, for example). A compass bearing (a reading, in degrees, of a visible or known landmark) should be established right away. The shoreline is an obvious base line from which to start. If that shorelines runs due E-W, and your trek takes you inland to the north, then it's obvious that heading south again will put you back to the ocean. A cross reference, perhaps to a tall headland or other notable land mass, will help you return to the same spot on that beach. Let's say you decide to head NW (315 degrees) from your landing point. Your return trip will be in the opposite direction (SE, 135 degrees or 180 degrees less than NW).
When sighting a course along unfamiliar ground, you cannot always continue in a straight line. You might encounter a body of water, or impassible terrain or vegetation; you need to work your way around such obstructions without getting off course. If you deviate off course, you need to adjust your deviation so you can circle around the obstruction and get back on line. Sometimes this means picking out interim landmarks and taking interim sightings along the route until you can follow your original course. It's always good practice to sight along your line of travel and pick out interim destinations along the way.
The best way to learn and appreciate a compass is to take a course in basic orientation. You'll learn all aspects of a compass and gain practical field experience as well.
Once you've got Compass Basics down, next up is the Maritime Compass. Different? Absolutely. Difficult? In some ways, easier!
Related Articles
Whenever you're paddling, there's safety in numbers and so it's generally not a good idea to paddle…
Driving a car safely involves much more than merely focusing only as far ahead as the taillights of…
Here's a list of ten tips that I found useful when paddling with different groups. Paddling group…
The access point on Lake Monson is at the head of a small inlet on the amoeba-shaped, glacial formed…
