
How To Winterize Your Boat
I live in Minnesota where winter stops canoeing and kayaking cold. Snow arrives in late October and hangs around till May or insanity sets in, whichever comes first. By Thanksgiving, even die-hard Viking paddlers have garaged their canoes and waxed their skis!
Spring often comes suddenly to Minnesota, and serious paddlers want to be prepared for the first nice day. So, they carefully repair and winterize their boats before they store them away. Everyone has an annual ritual.
Here's mine:
CLEAN OUT THE GOOBERS
Start with a thorough washing, inside and out. Use plenty of hot, soapy water. Flush under the decks of canoes, and deep into the ends of kayaks. You won't believe how much road grime and debris accumulates there.
Gummy tree sap and ground-in dirt can be safely removed with a wet sponge and "Soft-Scrub®" kitchen cleaner. For serious stains and scum lines, you may want to try a commercial hull cleaner, like Star-brite®. When the hull has dried, go over it inch-by-inch and mark (with chalk or a grease pencil) any damage you need to repair. Now's the time to polish out light scratches and fix gel-coat damage.
POLISH OUT SCRATCHES
You can polish out light scratches on fiberglass/Kevlar canoes and kayaks. Some of the more aggressive automotive paste cleaners do a fair job, especially when they're applied by machine. Use a light touch on the buffer: bear down hard and you may cut into the furry Kevlar (which can't be sanded) below.
Deep scratches are best left alone, unless they are so deep they abrade the Kevlar beneath. You'll want to patch any furry hairs (Kevlar strands) that protrude from the scratch. If the damage is light, simply flow epoxy resin into the cut. When it has hardened, polish and paint it. If there are long Kevlar "hairs" exposed, saturate the hairs with epoxy then cut them off while the resin is green.
Heavily scored or broken fiberglass/Kevlar should be covered with a fiberglass patch. Blend the edges of the hardened patch to the surrounding hull and paint it. Scratches on polyethylene and Royalex craft can't be removed. Manufacturers suggest that you use a heat gun or hair dryer to remove dents on Royalex canoes. My experience suggests that simply exposing the dent to the hot sun for several days works about as well and eliminates damage that can result from over-heating or over-working the ABS material.
REPAIR THE GEL-COAT
I once watched a man and boy paddle a beautiful Kevlar canoe through a shallow, rocky passage. There simply wasn't enough water to float a canoe, and portaging would have been a handful. The polished green gel-coat took a terrible beating as it bumped and scraped along.
"How can you treat a beautiful canoe like that?" I asked. With a broad grin, the man replied: "Here's hoping I live long enough to wear it out."
Admittedly, in forty years of canoeing I've never worn out a canoe, though once, I did break one in half. That's the miracle of canoes and kayaks: they can almost always be repaired - often, to "showroom-new" quality.
Duct tape will usually keep you going strong all summer long. The time to make small repairs is in the fall, just before you store your canoe for winter.
It's easier to repair chips on fiberglass/Kevlar canoes if you don't follow the canoe maker's instructions. Gel-coat is runny and difficult to get a good color match. Here's my method: You'll need these materials: White polyester putty (available at marinas) or auto body bondo. For the strongest repair, mix colloidal silica with epoxy. Epoxy and related repair materials may be mail ordered from the Northwest Canoe Co. the Gougeon Brothers, Inc., Ad-Tech or MAS Epoxies. Information is on the web.
You'll need 60 and 100 grit sandpaper, and 200 grit wet-dry finishing paper; color-matched auto acrylic spray paint, paste wax and pumice. Procedure:
- Pick out the shards of damaged gel coat with the blade of a knife.
- Catalyze the polyester putty (use extra MEKP to produce a hot mix) and work the peanut butter thick mix into the break to over-flowing. Thicken epoxy resin with colloidal silica. Caution: be sure you wear a mask when mixing colloidal silica. The fine particles go deep into the lungs!
- When the putty is firm, slice off the excess with a knife. Allow the remainder to cure completely then sand it level with progressive grits of sandpaper. Finish to silky smoothness with 400 grit wet sandpaper.
- Spray paint the patch with matching auto acrylic. When the paint has dried, use paste wax and pumice to blend the paint to match the hull. Or, use fiberglass boat wax (available at marinas) which has pumice mixed in.
If you have a natural gold Kevlar canoe (or one whose color you can't match), mask a short artificial water-line along the stem (figure 1) and paint the masked area an attractive color.
APPLY ULTRA-VIOLET PROTECTANT
Some years ago, I observed an Old Town tripper which had been stored for years in direct sunlight. The plastic rails had a spider web of cracks!
It's a good idea to apply an ultra-violet inhibitor (I recommend 303 Protectant®) to your canoe or kayak several times a season--and again before you store it away. The chemical hides scratches - gives a slick new look! - and prevents sun damage. Important: apply protectant to the inside of your canoe too - especially to unpigmented (gold-colored) Kevlar which discolors quickly in sunlight. Many canoe companies now recommend formula 303 Protectant instead of wax.
If you want a show-room look:
- Clean the hull with Meguire's #1 Deep Crystal automobile paint cleaner.
- Polish with Meguire's #2 polish.
- Apply #303 Protectant.
TORQUE THE TRIM
Canoes flex as you paddle; screws work loose and thwarts and seats crack. The vibrations of car-topping also have an effect. Nuts and bolts should be tightened at least once a season, and again before winter storage.
Tip: owners of wood-trimmed Royalex canoes are advised to remove the gunnels (near the decks) of canoes that will be stored in sub-freezing weather. It is suspected that uneven rates of material expansion cause Royalex to crack. I'm not sure. My four wood-trimmed Royalex canoes are stored in an open shed. No problems, even after a recent Minnesota winter where temperatures hovered at 42 below. My experience suggests that cracks develop when canoes are used in cold weather then turned over and put away "wet". Bilge water seeps into the wood rails and screw holes, where it freezes and cracks the hull.
I never loosen the screws on my Royalex canoes. Instead, I keep hardware uniformly tight, and I oil (Watco or Djeks Olay) the wood after every trip--and thoroughly before winter storage. In transitional weather, I sponge out accumulated water before I turn the canoe over to load it on my car. This keeps water from soaking into the rails.
Note: Here's a sureway to prevent wood-trimmed Royalex canoes from cracking in cold weather: Unscrew the wood the rails about two feet back from each end, then enlarge the screw holes in the Royalex (just the Royalex!). Then, screw the rails back in place. The Royalex will shrink when it gets cold but it won't crack because the enlarged screw holes won't pressure the screws. It works! Another option is to horizontally slot the screw holes in the Royalex. You need only enlarge or slot the holes near the ends; no need to do the whole boat.
Important: the underside of the gunnels need oil too: a foam varnish brush prevents most drips. Oil stains Kevlar and plastic, so mop up drips immediately!
If you want "furniture grade" trim, rub finishing oil into the wood with 400 grit wet/dry sandpaper, followed by 000 steel wool. Polish the excess dry with a lint-free cloth. Repeat as needed to get a deep rich sheen.
REMOVE DENTS IN WOODWORK
Dents in wood are easily removed by this process:
- Wet a cotton cloth, fold it in half and place it over the dent.
- Place a hot clothes iron over the cloth and allow the cloth to "steam" until the cloth is dry.
- Remove the cloth. The dent should have disappeared. If not, sand off the wood "whiskers" and steam again. Repeat until the wood is silky smooth. Then apply finishing oil or varnish, as the case may be.
It takes half a day to repair gel-coat, tighten (don't over-tighten!) bolts, clean and polish the hull, and apply an ultraviolet protectant. Oiling or re-varnishing the wood is the final preparation for winter.
TO KEEP WOOD-TRIMMED CANOES FROM COMING APART AT THE ENDS
The following method will prevent wood-trimmed canoes from coming apart at the ends. You need to do this to your canoe only once. It's best done when the craft is new.
The gunnels and decks of modern wood-trimmed canoes don't have drain holes like those on traditional cedar-canvas craft. As a result, bilge water runs down the inwales (inside gunnels) of the canoe when it is turned over and becomes trapped in the ends, beneath the deck plates. The accumulated water remains there until evaporation sets it free. Meanwhile, the thin wood at the apex of the decks rots and warps, and the canoe eventually comes apart at the seams.
Unfortunately, most canoe makers are insensitive to this problem. Those that aren't usually drill a large drain hole through the top of each deck. A more aesthetic solution is to drill a one-eighth inch diameter drain hole through each stem just below the deck plate. This hole is invisible unless you view the canoe at eye level, "head on".
The final touch is to epoxy the inside decks and inwales where they meet. Stand the canoe on end (lean it against your garage) and pour thinned epoxy into the constricted area. The excess should run out the hole you drilled. Wipe off pooled resin and later, clear debris from the hole with a small rattail file. Now, your canoe will never warp and come apart at the seams!
SUNLIGHT AND MOISTURE
Ultraviolet light is a killer (aluminum canoes are the exception), so store your canoes and kayaks in a weather-protected area out of the sun. An open shed or canvas awning provides enough cover. If you use a garage, be wary of windows which project a focused beam of light on to the hull. If you must store your canoe or kayak in a light path indoors, apply an ultraviolet protectant to the hull, and cover the UV-exposed areas with a cotton towel or sheet. Do not place black plastic over the hull. Waterproof plastic may encourage condensation and cause the gel-coat or pigment to discolor.
STORAGE IDEAS
Canoes should be stored upside down on saw horses, wood 2 x 4's, metal bars or nylon slings. Bars should be carpeted, especially if the canoe has wood rails. Some paddlers suspend their canoe from thick dowels that are tethered to the ceiling joists of their garage. This "trapeze" lofts the canoe(s) above vehicles and saves space.
If you must store your canoe outside, try to find a shady place that's not in the path of high winds. Fiberglass/Kevlar, Royalex and polyethylene canoes can be safely stored outside if you've applied an ultraviolet protectant. Wood-canvas canoes and all other canoes that have wood trim should be protected from the weather. Some paddlers use car covers made from Dupont Tyvek® material.
A 50-mile-per-hour wind will turn an unsecured canoe into a kite, so tie down any canoe that's stored outside. If you keep your canoe on saw horses in your back yard, stake both the horses and the canoe to the ground.
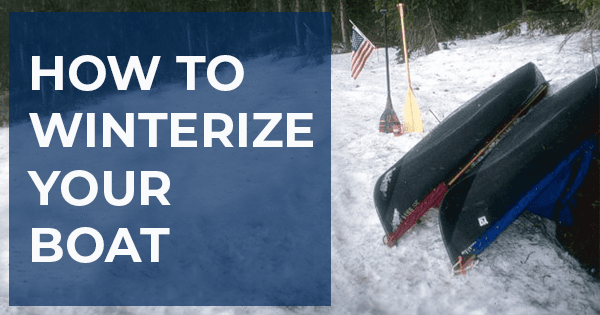
Do brush off snow as it accumulates. A heavy snow load can bend or break the back of most any canoe.
SPECIAL CONSIDERATIONS FOR STORING KAYAKS
What's been said about canoes applies equally to kayaks, with these exceptions:
- Small critters like to make nests in the ends of kayaks, so be sure you clean all the debris out of the ends before you store them away. And don't keep bird seed or dog food in your garage: mice may gather it and over-winter in your kayak!
- Storage hatches should be left open so air can circulate. Treat rubber seals with 303 Protectant® or a rubber care product. Tighten--but don't over-tighten cleats and other hardware.
- Due to their integral decks, kayaks are much more rigid than canoes. The extra rigidity allows you to safely store fiberglass/Kevlar kayaks in a number of ways. Here are some:
1. Make slings from nylon webbing and suspend the slings from the ceiling of your garage. Store your kayak upside down (hatch open) on the slings.
2. Fiberglass/Kevlar kayaks may be stored right-side up (hatches open) on the floor of your garage. Place carpeting under the hull to prevent scratching. There is no need to prop the ends.
3. If your car-top carrier has curved kayak cradles (it should), set the cradles on the floor of your garage and store your kayak in them.
4. Hang your fiberglass/Kevlar kayak from its grab loops (be sure they're solid before you do!).
Don't hang polyethylene kayaks from grab loops or store them on the floor of your garage. The following section tells why.
SPECIAL CONSIDERATIONS FOR STORING POLYETHYLENE KAYAKS
Heat deforms polyethylene and may cause it to droop under its own weight. Extreme cold--winter storage--has no effect. However, if you store your PE kayak in a hot garage during the summer months, you'll want to follow the guideline below:
Don't hang the kayak from its grab loops! Use nylon slings at the bulkheads to spread out weight. Most kayakers just string climbing harness between hooks from the joists of their garage. Set the kayak sideways in the nylon cradles: this position provides more rigidity than hanging it right-side up or upside down.
I am indebted to Canoe & Kayak contributing editor, Andy Knapp for these suggestions on winterizing and storing kayaks. Andy was the hard goods buyer for the Midwest Mountaineering store in Minneapolis, and a member of the board of directors of TAPS--the Trade Association of Paddlesports. In 2009, he lost his gallant fight with cancer.
Winterizing your canoe or kayak is mostly common sense: clean out debris, wash and polish the hull, repair damage, apply an ultraviolet protectant to plastics, oil or varnish the woodwork, uniformly tighten bolts, and store your treasure in a weather-protected, well-ventilated area, out of reach of small animals. Get your boat ready before the snow flies and you'll be ready to climb aboard when the rivers run again.
I might add that deadly serious paddlers make it a point to leave their boat racks on their car all year-round. After all, who knows when a splash of summer sun may produce some open water? Quick! Phone a friend and sieze the moment.
Cliff Jacobson is a professional canoe guide and outfitter for the Science Museum of Minnesota, a wilderness canoeing consultant, and the author of more than a dozen top-selling books on camping and canoeing. www.cliffcanoe.com
Related Articles

In this video, the team at Austin Kayak show you how to rebuild your keel if you have created a hole…

In this video, Chad Hoover shows you how to quickly fix the hull of your fishing kayak. All you need is…

I remember the anticipation of the spring thaw when I could finally get out on the water again after a…

"The major difference between a thing that might go wrong and a thing that cannot possibly go wrong is…