
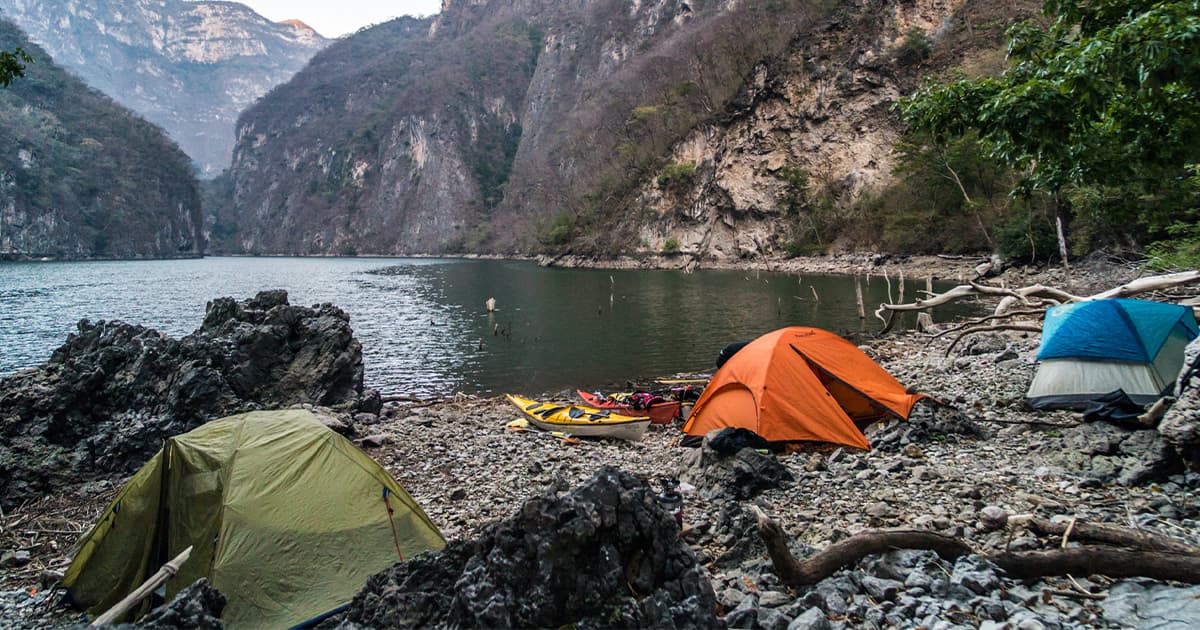
How To Pack Your Kayak for a Camping Trip
So, you are finally out on the water and itching to spend more time outdoors – maybe go a bit further and explore, maybe spend a weekend at a spot that can only be reached by water, or maybe spend a week or more on an expedition. Whatever the plan, kayaks can help you pack and carry camping gear, and depending on the type of kayak you use, your carrying capacity may range from ultralight to super glamper. This article will hopefully have some tips and things to consider as you prepare to camp out with your kayak.
Different Types of Kayaks
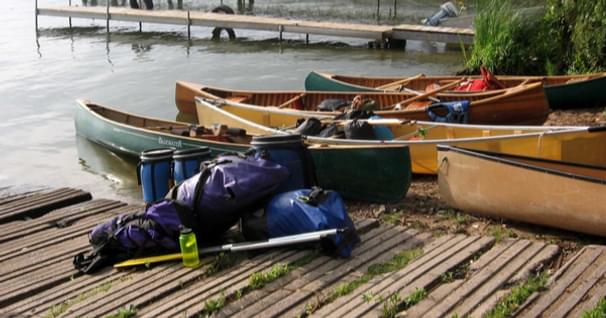
First, let’s address different types of kayaks and what they may allow us to do. For a lot of carrying capacity, touring sea kayaks are fantastic. They will usually have 2-3 watertight hatches that can be filled with gear. For other styles of kayaks, such as surf skis, recreational, white water and sit on tops, you can now find lots of models and crossover models that have hatches and storage areas allowing paddlers to take more equipment than ever before. And while you can always stow a drybag on the deck of any kayak, being able to put gear away in hatches not only can help in keeping things dry but can help in keeping it away from the wind affecting your paddling.
Keeping Your Gear Packed and Dry
Hatches
Are they always 100% watertight? The real-world answer is no. Don’t get me wrong, a new kayak with fantastic hatch covers will help keep water out. But it is possible that a hatch cover may not be closed all the way when getting out on the water, or a wave may pop a cover off, or many other possible scenarios having water getting in there somehow. So, when packing our gear, it’s a good idea to think of hatches as “mostly dry places” with the possibility of water getting in from time to time. That’s where drybags can help keep gear from getting wet while in hatches.
Dry Bags
Are they always 100% watertight? The real-world answer is also no. And once again, don’t get me wrong, a new dry bag can be super watertight and may be for a long time. But there can be human error while closing them, as well as over time they might not be as dry as when they were new. So, keeping this in mind, you can use dry bags accordingly when packing camping gear. Use your best or newest ones on items you want to ensure stay driest, as well as potentially double bagging if needed. For me for example, most of my camping gear can handle getting a bit wet – but depending on conditions I might double bag my sleeping bag. After a hard day of paddling, I want to lay down and rest in a completely dry sleeping bag.
There’s different types, sizes, and materials for dry bags. Bigger ones make it easy to pack bulky items like sleeping bags, but many big dry bags can, in turn, prove hard to pack into kayak hatches. If possible, using medium and smaller ones in the mix can help in fitting within the different hatch shapes – much like playing a game of Tetris.
Our Top Picks for Dry Bags:
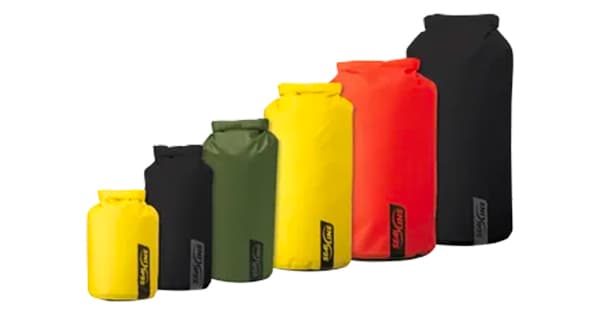
There is nothing worse than wet gear, so check out these great dry bags ranging from 5L to 105L.
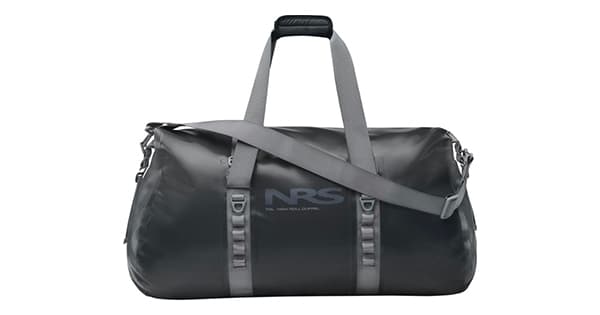
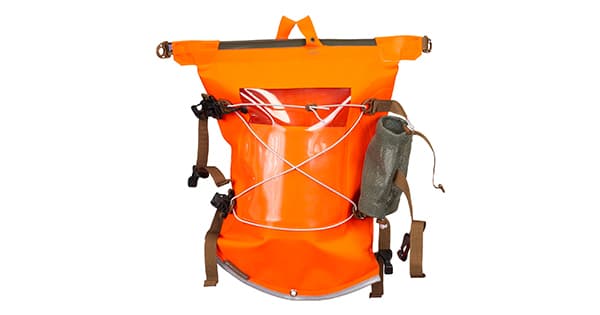
Deck Bags
Deck bags are usually different types of drybags that are shaped to fit on a kayak’s deck and will often have straps to keep them attached and in place. They can be very helpful in keeping items easily within reach during a trip, like snacks, charts, or a camera. At the same time, you’ll have to consider how the wind will affect your handling when you add anything bulky to your deck.
Here’s an example of a deck bag:
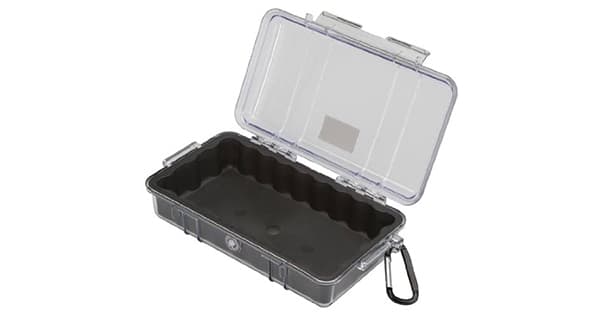
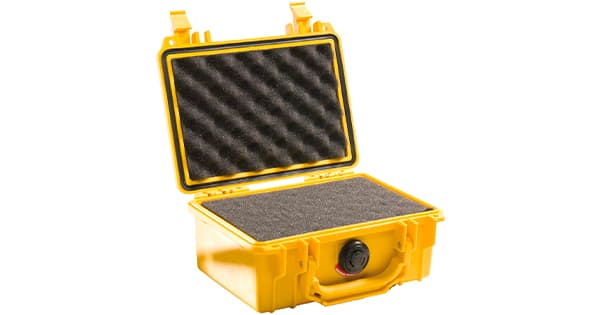
Watertight boxes
For must-stay-dry items such as electronics, sometimes a watertight box can be an option. Cases such as those made by Pelican and other brands have been around for a long time and are usually a go-to option for kayak campers. It might be worth testing how watertight it is indeed ahead of time depending on how valuable the item it will be protecting on your trip.
Here are some examples of watertight boxes:
Pelican 1060 Micro Case - for iPhone, GoPro, Camera, and More (Black/Clear)
Gear Placement Within a Kayak
If you’ve never looked inside your hatches before, make sure to do so before your first trip. Different kayak hatches will have different shapes, and often their setup (skeg, rudder, etc.) will create interesting layouts and help you fit specific items. For example, my old skeg box allowed for items like tent poles, gas canisters, or beverage containers to be packed all the way to the end of the stern. Similarly, I’d usually separate my actual tent from the tent poles to take advantage of the skinny end of my bow.
TIP: When packing long sea kayaks, a good tip is to attach a bit of string or paracord to items in hard-to-reach places – that way you can pull on them to retrieve if they get wedged out of reach while paddling.
Distributing / centering weight front to back and side to side
Just like when packing a car for a trip, you want to try to distribute the weight of your packed items in your kayak for the best possible handling. Try to keep heavy items as close to the bulkheads/middle as possible, as well as the centerline of the kayak. If possible, keep them on the bottom of the kayak as well (things like water bags, water bottles, etc.). The lower the placement of the weight, the better the handling. For example – something heavy at the bottom of the kayak hatch will help keep the kayak stable, while something heavy close to the deck or above the deck will make it more unstable. In the case of rolling, having heavy items at the bottom of the kayak will also help you as you try to get back upright. Also, use gear placement to your advantage to keep things from moving around. If things stay in place, it’ll make your handling more predictable vs. things moving around as you paddle.
TIP: If possible, try going for a test paddle with your kayak fully loaded to see what the handling will be like. That way you can be ready if you plan on tackling many miles at once, or a difficult location or crossing. Similarly, if it’s your first time packing your kayak, consider doing a packing trial before the trip to test where things will go. I’ve witnessed paddlers having to leave gear behind at the launch due to overestimating how much would fit in their kayak.
Packing gear in the cockpit
This is a tough area because not all kayak cockpits are the same. While many are roomy and might seem inviting for packing gear in, during a capsize the gear could shift around and potentially trap you in place depending on the shape of your cockpit. Personally, I try to fit everything I can in my hatches and keep my cockpit clear – also knowing that if I take a swim, the hatches will remain closed (and probably dry), vs. the cockpit filling up with water.
Also, keep in mind that if you carry loose items in your cockpit and take a swim, you’ll end up having a “yard sale” as you see your items (at least those that float) displayed for the group near you as you (and maybe your group) perform your rescue or recovery of choice.
Kayak camping is a wonderful combination of many different disciplines. Reaching and staying at hard-to-reach locations, venturing out on multi-day expeditions, a kayak can truly be a great camping adventure companion – allowing you to bring as little or as much equipment as needed (or that you can fit in it!).
Luke Rovner (Kayak Hipster) is a sea kayak instructor, photographer and filmmaker. Combining his experience as a photo and video professional with a love for kayaking, he started Kayak Hipster with the goal of capturing outdoor adventures and sharing kayaking tips.
Related Articles
After lots of research, maybe some classes, maybe some demo days, or maybe after finding the right sale…
You may recall Abraham Maslow ‘s hierarchy of needs from ninth grade social studies. Maslow says, you…
Before I was domesticated, I spent more than a decade working paddling gigs between paddling trips.…