
Building A Kayak Repair Kit
"The major difference between a thing that might go wrong
and a thing that cannot possibly go wrong is that
when a thing that cannot possibly go wrong goes wrong
it usually turns out to be impossible to get at and repair."
- Douglas Adams
The American mountain man, first European explorer to venture deep into the mysterious heart of the North American continent, carried a bit of gear he called his "possibles" bag.
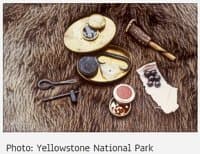
This small leather pouch contained the intrepid wilderness traveller's most crucial bits of gear: a sharp knife, a tin of dry gunpowder, and a few musket balls. A flint and steel. Several feet of good stout cord or sinew. A needle, thread, and leather awl. A tallow candle stub. A few squares of miner's hardtack (the "PowerBar" of the 1700s). Maybe even his pipe and some tobacco, just to pass the time while he considered his predicament.
The possibles bag contained, essentially, all his essentials. Everything a backwoods paddler or traveller might possibly need when he'd broken his boat, hundreds of miles from the nearest outpost, with no help in sight.
Repair Kit Purpose
As with the voyageur's possibles bag, your own repair kit is intended to allow you to make any necessary field repairs to your kayak or those of your trip partners, or even fix other cooking and camping gear. My kit is divided into two parts:
Part 1 is quite compact and contains the bare minimum to replace a lost hatch cover or seal a holed hull, without even leaving the water, so this is carried in the dayhatch or other easily accessible place.
Part 2 is a larger, more complete kit for making more substantial repairs once safely ashore, so it is packed somewhere more secure. Note: you'll also want a complete First-Aid Kit, as well as an Emergency Bailout Bag.
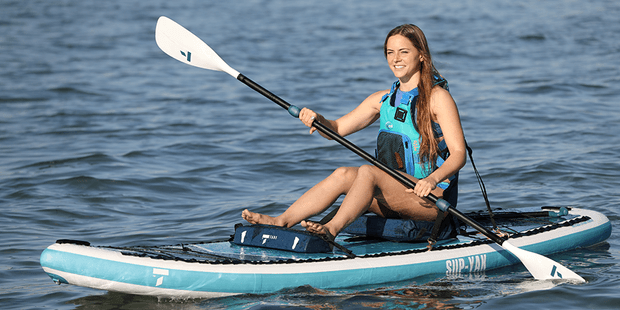
TAHE 10'6 & 11'6 SUP-YAK Inflatables
2-in-1 Kayak & Paddle Board complete packages for single or tandem use.
Repair Kit Requirements
The complete repair kit must contain tools to remove and replace nearly any bit of hardware on the typical kayak or canoe, and to fabricate and improvise parts from other items at hand; various adhesives, lubricants, and materials for binding stuff together; and assorted deck fittings and other replacement kayak parts. It must be somewhat easily accessible, compact, and of course, kept dry. There may be situations which require the use of two of something, such as two identical wrenches to tighten the bolt and nut retaining a rudder, so I suggest you carry duplicates of such tools, or adjustable substitutes.
Kayak Hull Repair
When you discover a cracked and leaking hull, put ashore as soon as possible to inspect the damage. Using the small pack towel from your repair kit, dry the surrounding area; to help evaporate and force water out of cracks and crevices, apply rubbing alcohol or even your precious whiskey (but only in the most dire of circumstances).
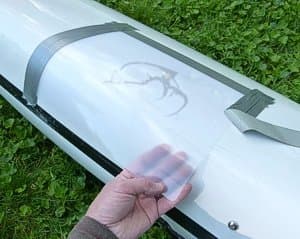
Once thoroughly dried, apply quality duct tape over the crack or hole and use a plastic credit card or hotel room key-card as a squeegee to firmly adhere it. For larger cracks or holes, use duct tape to affix a piece of the heavy poly over the fracture. If the hole requires a bit more structural integrity, tape a section of a thin, flexible plastic camp-kitchen cutting board over the hull.
The polyethylene plastic used to make roto-molded kayaks is notoriously difficult to adhere anything to, so most glues, epoxies, and other adhesives will offer only temporary repairs. Once you make it back to your home port, you will achieve more permanent results with a "poly welding" kit, offered by several manufacturers. Essentially, you use a heat source to melt bits of new poly plastic into the hole or crack of a damaged hull.
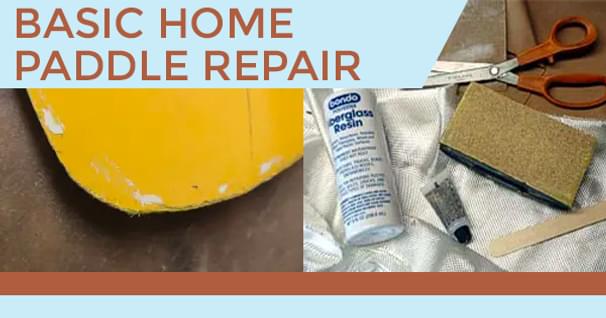
Nearly all fiberglass kayaks are made with polyester resin, and can be easily repaired in the field. You'll need several ounces of liquid polyester resin, a bit of MEK (methyl ethyl ketone) hardener, a plastic spreader, and a few square feet of fiberglass cloth. If you have't used these materials before, a rocky, windswept shore is probably not the place to learn, so practice at home first, and always carry the instructions that come with the kit.
Typically, Kevlar or carbon-fiber kayaks are constructed using other types of resins, and can be more difficult to field-repair. Check with your boat's maker to determine the type of resin used, and for recommended repair materials.
An Emergency Hatch Cover
"Hey, I'm takin' on water!" your paddling partner shouts to you, halfway through a five-mile crossing. You see that his hatch cover is missing, waves are washing over his decks, and indeed he is now hauling a sizable bit of the ocean around in his stern hatch.
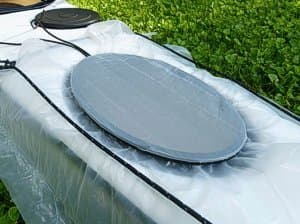
If you are some distance from shore, and if conditions allow, raft up with the unfortunate fellow and begin pumping out the waterlogged compartment with your bilge pump. Once mostly dry, slap the large, thick poly sheet from Part 1 of your repair kit over the gaping hatch opening and secure it with the shock cord around the hatch rim. Cinch tight with the cord lock, or tie off the cord to hold it securely.
Done properly, this makeshift hatch cover will not only get you through the day, but perhaps even the rest of your trip.
The Repair-Kit List (Rev. 13) The following is my own list of repair items I carry onboard when spending anything more than a day on the water. Like all my other lists, this one is constantly evolving as I reconsider and add certain items, or as my situation changes. Consider your particular paddling environments and assess your unique needs when putting together your own "possibles" bag.
What do you carry in your fix-it kit? Tell us in the Comments below!
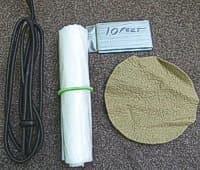
Part 1 Carried in deckbag, cockpit, or dayhatch, for making on-the-water repairs
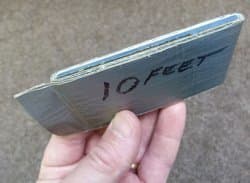
- Emergency Hatch Cover: Heavy-gauge Polyethylene Sheet, 28 x 28", and Shock Cord, 3/16 x 4', with large Cord-Lock
- Pack Towel, 6 x 6"
- Duct Tape, 10', 3M or other quality brand, wrapped around old plastic hotel room key-card
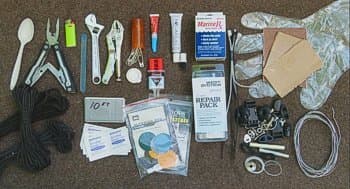
Part 2
Carried in waterproof container, somewhere secure, for all other repairs
| Tools: • Screwdrivers: Phillips & Standard • Small Adjustable Wrench • Needlenose Pliers w/ sidecutters • Multi-tool • Hacksaw Blade, short section • Butane Lighter • Sandpaper, assorted grits, small pieces • Plastic Gloves • Eyeglass Repair Kit • Spare Dining Utensils | Misc. Hardware: • Stainless Steel Nuts & Bolts • Deck Cleats w/ Screws • Misc. Strap Buckles • Tent Pole Repair Sleeves • Parachute Cord, 1/8", 20' • Heavy-gauge Braided Polyester Fishing Line, 10' • Shock Cord, 3/16 x 4' • Perimeter/Deck Line, 5' • Monofilament Nylon Fishing Line, large and small, 10' • Skeg Cable or Rudder Cable w/ Crimps • Rudder Pivot Bolt w/ Locknut |
| Supplies: Alcohol Swabs for drying/cleaning damaged areas Superglue 5-Minute Epoxy Small Fiberglass Repair Kit: 8 oz. polyester resin, .20 oz. methyl ethyl ketone (MEK) hardener, plastic spreader, 3 sq. ft. fiberglass mat Epoxy Putty, marine-grade Duct Tape, 10', 3M or other quality brand, wrapped around old plastic hotel room key-card Urethane Adhesive Self-Adhesive Nylon Fabric Patches, assorted sizes Sleeping Pad Repair Kit: Patches, Adhesive, Tape Heavy-gauge Polyethylene Sheet, 24 x 24" Assorted Needles & Safety Pins Copper, Brass, or Aluminum Wire, 5' Cable Ties, assorted sizes Silicone Grease 3-in-1 Oil | |
Jeffrey Lee edits Superior Paddling, a kayaking website that seeks to inform, inspire, and compel sea-kayakers to explore and appreciate the endless possibilities of paddling and kayak-touring in the upper Great Lakes region. He considers himself an "enthusiastic student" of the art of sea kayaking.
Related Articles

In this video, the team at Austin Kayak show you how to rebuild your keel if you have created a hole…

In this video, Chad Hoover shows you how to quickly fix the hull of your fishing kayak. All you need is…

I remember the anticipation of the spring thaw when I could finally get out on the water again after a…
I can still see myself thrusting the tip of my fiberglass paddle into the murky water as I initiated a…