
Training Canoe Newbies
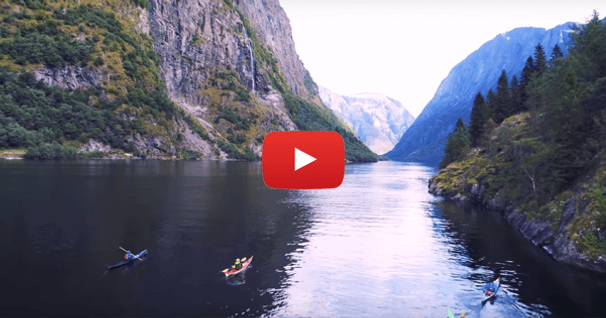
You are planning to canoe a Canadian river that has many challenging rapids. Weeks before the wheels roll north, some of your friends drop out and you have to scramble for replacements. The recruits have no whitewater experience and time is too short for proper instruction. They'll have to "learn as they go". You assure your new friends that they have nothing to worry about.
Or do they?
Frankly, it has been my observation that most people who paddle Canadian rivers aren't very skilled in rapids. Successful runs are usually the result of a few well-practiced moves and the good judgment of an experienced guide who leads the way. If a canoe team can turn their boat right and left, paddle forward and backwards in a straight line, and execute a reliable back-ferry, they will usually come out all right. Beginners can learn these techniques in a few hours, if you follow this plan.
FIRST, EMPHASIZE THESE RULES
- Stick to your assigned paddling side! The only exception is in the bow, when performing a "cross-draw".
- Do not change your hold on the paddle. I tell beginners that their hands are "glued" to the grip and shaft and cannot move.
- Don't choke down on the paddle shaft! Wide-spaced hands shorten paddle reach and the effectiveness of your strokes! The lower hand should loosely grasp the shaft a foot or so above the blade--the distance being roughly equal to the freeboard of the canoe, or a bit more. I sometimes stick duct tape on the shaft to mark the spot-and I reprimand anyone whose hand falls below the tape.
- Kneel in the canoe, your buttocks firmly braced against the seat. Those who can't kneel for physical reasons should lock their knees firmly under the inwales (inside gunnels) of the canoe.
KEEP IT SIMPLE Scenario: Your float plane sets you down in a quiet bay above an easily canoeable rapid. What should you do?
- Load the canoes and run the rapid. Formal white-water training will come later.
- Load the canoes, then practice paddle strokes for an hour or so in the quiet bay. Then, run the rapid. More training will come later.
- Same as (B) but practice in empty canoes.
- Proceed to the head of the rapid. Unload the canoes and practice "current maneuvers" for a while.
Answer? "B", because people should polish their paddle skills on calm water before they challenge currents. It's wise to practice in loaded canoes so everyone will understand how a heavy belly load affects performance.
Aggressive maneuvers, like eddy turns and peel-outs are best learned at home where the water is warm and rescue boats are standing by. Yes, we do practice these techniques on wilderness trips. But we choose our rapids carefully and we don't play too aggressively.
TEACH JUST TWO STROKES Your novices are nervous - they know that rapids lie just ahead! So don't overwhelm them with a routine of strokes that are "nice to know". Two well-chosen strokes are enough:
BOW STROKES: Draw and cross-draw. With these, the bow paddler can move the bow smartly right or left. The stern paddler should simply "kneel and watch" as his partner flails away. When the bow person can confidently toss the bow to the right or left, on command, it's time to turn your attention to the stern.
THE STERN will learn the draw and stern-pry. When teaching the stern pry, I emphasize that the stroke should begin near the tail of the canoe-paddle tip nearly touching the side-wall of the boat. Smartly pry the paddle 8-12 inches outward (no more!). The bow-person rests while the stern person practices. Practicing alone helps the student better understand how his or her efforts affect the boat.
COMBINING STROKES When both partners have their two strokes down pat, it's time to combine them. For example, if the bow person paddles on the left and the stern is on the right, these combinations will produce the following actions:
| Combination | Action |
| bow draw + stern | = canoe pivots left |
| bow draw + stern pry | = canoe side-slips left |
| bow cross-draw + stern draw | = canoe side-slips right |
| bow cross-draw+ stern pry | = canoe pivots right |
Allow 30 minutes of practice time then give the "final exam".
FINAL EXAM: Call out an action (example: "Pivot Right!"). The team must correctly and quickly execute the maneuver without communicating (no talking!).
ADENDUM TO THE FINAL EXAM Teams must paddle their canoe backwards (50 meters) in a straight line, pivot around and continue to back-paddle to their starting point. This time partners can-indeed must -communicate their intentions! The bow may draw or cross-draw to correct the course; the stern can pry or draw. Before we begin, I show students how changing the angle of the stroke (e.g. the diagonal draw) provides both a turning and power component. Then, I turn them loose to practice, telling them to "go slowly and smoothly". Ten minutes later, they've got it and we head to the rapid, confident all will be fine.
At this point, everyone knows how to turn and side-slip their canoe, and to power backwards in a straight line. This is usually enough to discourage disaster. The crowning jewel however, is the back-ferry, which will be taught later, in an appropriate current, after this first lesson has sunk in.
Most beginners can master the basic strokes in about an hour. They'll need half-a-day for them to become automatic. Then, you can introduce the back-ferry and, much later, the high and low braces and eddy turns.
Cliff Jacobson is a professional canoe guide and outfitter for the Science Museum of Minnesota, a wilderness canoeing consultant, and the author of more than a dozen top-selling books on camping and canoeing. www.cliffcanoe.com
Related Articles

By changing how you edge and balance your boat you can increase your stability and adaptability. Using…
Whether you were new to paddling in 2018 or you're an experienced paddler, you can never stop learning.…
Mention “pool session” and the first image that pops into most kayakers minds is a class in how to roll.…

Photo Credit: Darlene Patterson Many people who have paddled for years can't keep a canoe on a straight…