
Six Steps to Comfort and Control
Step 1)
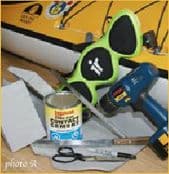
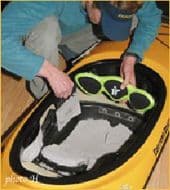
Gather all the necessary tools and supplies including: contact cement, mini-cell foam of various thicknesses, scissors, marker or grease pencil, bread knife, wood rasp, drill and drill bits, and an aftermarket back-band if you choose (photo A).
Step 2)
Wearing your typical paddling clothes, sit in your boat and experiment with your seating position. I decided to add a thin layer of foam to my seat for some grip, warmth and padding. The seat in my Current Designs Expedition is quite long but I needed to add some foam to the front, changing the angle so my skinny legs would reach up to the thigh braces. I added some big chunks of foam to the existing thigh braces. And I needed about a centimetre of foam on either side to make the hip pads, filling the gap between my hips and the seat pillar. Label and lay out all the foam pieces in preparation for gluing (photo B).
Step 3)
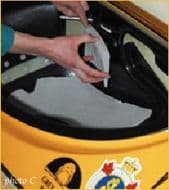
When applying the contact cement, just use a small chunk of foam as a brush. Apply just past your outlines; it is important the edges stick well. Glue the roughly cut pieces into your boat one by one. You get one shot with contact cement and then its stuck, so start at one corner and roll it into place (photo C).

Step 4)
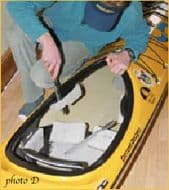
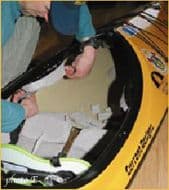
Once everything is glued, make your gross trimming and shaping with your bread knife (photo D). Then use the rasp to round off all the corners and slowly sculpt the per-fect fit (photo E). You’ll be hopping in and out of the boat to measure just how much foam to remove and how to shape it. Take a little at a time, but if you happen to take too much, just glue more on top and start again.
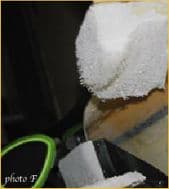
Step 5)
From two square blocks of foam glued together I was able to round and shape my thigh braces to lightly hook over my leg for more control. I also added a thin layer of foam where my knees contact the deck (photo F).
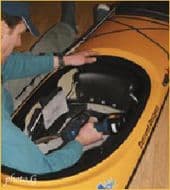
Step 6)
I removed the existing backrest by drilling out the rivots attaching it to the seat (photo G) and installed an Immersion Research backband (photo H). The IR back-band bolts to the seat pillars. It can be raised and lowered and has snowboard-type ratch-ets to click it forward, providing finely tuned lumbar support.
Reprinted with permission from Adventure Kayak volume 3 issue 2, Early Summer 2003.
Adventure Kayak magazine is based on one very simple concept, accessibility - getting readers onto the water. Editorial from across North America, placing as much value on fresh water lakes and waterways as coastal regions. Columns include: Urban Adventures, Paddling Gourmet, Trip Photography, Guiding Light (humour), Rock the Boat (critical look at issues), Techniques, In the Hatch (gear) and much more. Read full online at www.adventurekayakmag.com.
Related Articles

In this video, the team at Austin Kayak show you how to rebuild your keel if you have created a hole…

When Alv Elvestad, owner of Pakboats (www.pakboats.com) invited me to join him and three friends on a…

Experienced wilderness canoe trippers know that small errors can cause big problems. In my previous…