
How To Repair A Kayak
One of the considerations for deciding which type of material you want your kayak to be made from (wood/rotomold/glass/thermoform/inflatable-folding) should be the extent of damage you might suffer and the subsequent ease of repair - particularly structural damage that critically compromises the integrity of the craft. Depending upon the extent of use you plan to give your kayak, repair concerns may be as easy as a field fix of simply slapping on a strip of duct tape or a dab of marine putty and continuing on for the day.
If, however, your damage is major and may compromise your boat in any way, you’ll want to make sure that your repair is solid and lasting - or worse, even possible! The processes for basic repairs - smoothing a scratch or forcing out a dent - to filling a gouge or closing a crack each require their own protocols depending upon the material from which your kayak is made.
Before offering an overview of the ways each boat material is typically repaired - there are a few general ground rules that apply to all repairs; following them can help make fix-ups go much quicker. Not following them can create even more damage than what you had to begin with!
PRE-REPAIR HOMEWORK:

- A prudent first move when it comes to trying to repair your boat is to contact the manufacturer to double check on exactly what the material is and what adhesives, fillers and other applicable goos will bond with it - or more importantly - cause damage. If you intend to paint or coat over your repair, check to see which paints (or pigments added to your goo of choice) will adhere to the material;
- Specific repair sequences can be quite detailed, most manufacturers provide videos or extensive written/illustrated instructions on how to make repairs to their boats, as well as the tools, adhesives and other repair items you’ll probably need. YouTube also has myriad “how-to” clips on repairs - be sure to choose your “expert” advisors wisely!
- Larger areas where you have to actually replace lost hull/deck material can best be matched if you can get a piece of scrap material from your dealer or manufacturer - pairing material and color to your own boat;
- If you can find a similar piece/shape of material, and you are unfamiliar/uncomfortable with repairing your boat, practice the type of repair (filling in scratch, repairing a hole) on a sample piece first - to get a feel for how a heating tool works, for example;
- Coupled with #4, if you are concerned about a negative reaction to a particular adhesive, goo, or even heat treatment, find a place on your boat where you can make a test application that won’t affect the structure and is out of view;
- Plan to treat your repair like surgery in an operating room: all the tools and materials you’ll need should be laid out within reach; Be sure to wear eye protection, face mask and gloves.
- Work in a well-ventilated area;
- Mix just enough repair material you’ll need to complete the job quickly. Fast set-ups of some adhesives don’t give you much time to pause/hesitate;
- Always make sure the damaged area and immediate surrounding material is cleaned and free of any minute loose particles, grit, etc;
- Make sure you’ve given the adhesive/goo/putty/? adequate time to cure before you continue to work it or go on to the next step. Read the instructions on the container!;
- Consider clean-up to be as critical as the repair itself, especially if adhesives get onto other areas of the boat or otherwise drift/expand beyond the work area.
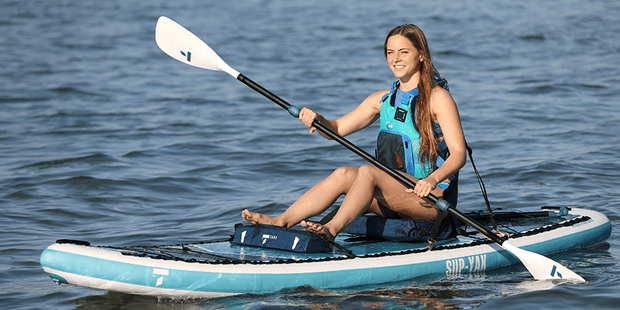
TAHE 10'6 & 11'6 SUP-YAK Inflatables
2-in-1 Kayak & Paddle Board complete packages for single or tandem use.
TYPICAL DAMAGE & REPAIRS:
Whether it’s fiberglass, gelcoat, varnish or a thermo-form finish, a scratch on the outer surface is just that, a scratch - a non-structural blemish. In general, similar “wounds” (scratches, dings, cracks) call for similar preparation processes.
Cracks in Hull/Deck - Today’s materials are virtually bomb-proof even under more extreme on-water conditions. If you’re in your kayak when it’s damaged so severely that a crack is formed, I’d be more concerned about serious injuries to yourself before I’d worry about the boat! However, boats do get dropped, smashed into submerged rocks and blown off racks, so major fractures can happen even to the high-tech stuff. The actual repair “fix” will still be dictated by the particular material. Here’s a synopsis of typical boat damage and the general methods of repair typically made for each of the major kayak materials (with a few TIPs thrown in as well.…)
Wooden Kayak Repairs
Anyone’s who’s put hundreds of hours into their home-built wooden kayak can be brought to tears to see their “baby” injured. The good news is that if it’s your boat, you’re always a ‘doctor in the house’ who can heal it. Most all repairs to wooden boats require the same tools and goos that were used in its construction. Rough surfaces can be sanded and refinished, broken strips or crushed hull panels can usually be repaired/replaced. It’s not necessarily quick and easy but a good wood-worker can usually bring it back to its original perfection.
TIP: When sanding through a varnished layer to reach sub-strata fiberglass, pay attention to the dust. Yellowish in appearance means you are still sanding the varnish; when the dust turns white, you are now into the fiberglass layer below.
Rotomold Kayak Repair
Two of the most common types of “damage” to a rotomold are scratches in the hull or pressure indentations (“oil canning”). Such depressions happen when a sun-baked or super-stressed boat tied too firmly to a rack caves in as the plastic is heated or stressed.
Quite often an indentation will diminish over time, using the plastic’s “memory” to regain its original molded shape. Sometimes, however, that depression needs a little help ‘remembering’.

Direct exposure to hot sun is often the simple way to expose the indentation to a softening heat source. Another easy method of removing an indentation is to apply heat above the depression and coupled with light, but direct blunt pressure from below. I have found it necessary - and quite effective - to use boiling water poured repeatedly over the indented surface until it softens enough to form it back into shape. A carefully rotated hot air flow can also be used to soften the plastic.
TIP: If using boiling water to soften an area, apply 2-3 layers of a terrycloth towel over the damaged area and pour the boiling water down through the towel instead of directly onto the surface.

Scratches and “snags” on a rotomold boat can actually be shaved off. Use a razor-blade or box-cutter type to remove protruding spurs - cleanly cutting them off even with the surface. Shaving the fuzz from an abraded area is often easily accomplished with a cheap, disposable razor (BICTM) or a surform tool.

Rotomold cracks can usually be repaired by “welding” the crack - sealing and filling the area with a hot welding gun/melting rods (NOTE: you cannot plastic weld cross-linked poly’ material). It’s a simple but somewhat delicate procedure in that too much heat can further damage the area around the crack.
TIP: To prevent the rare, but possible extension of the crack during handling, you can drill/melt a small 1/8” diameter hole at each end of the crack to prevent it from “running” farther along the surface. Start the weld just beyond hole, across and into the hole, and then follow along the crack as you apply heat.

It’s important on any crack to clean up along its length and make sure the edges align. In some cases, it may be helpful/necessary to insert a thin blade into the crack to expand and expose it’s bonding edge, advancing the opening as you fill/seal the crack from one end to the other. Oftentimes patch work should also be done on the inside of the boat as well.
TIP: A relatively new filler material has been developed to adhere to rotomold plastic, as well as other materials - making it a quick and simple repair adhesive/filler for scratches, cracks and other repairs of all types of boat materials. NOTE: some “plastic weld” fillers do not adhere to polyethylene plastic).

Short of deliberately forcing the boat down over a sharp spike or blasting it with a shotgun, I can’t imagine a rotomold getting a hole in it - other than perhaps a tiny, pin-head puncture. You’d more likely create a hole by concentrating too much heat into too small an area with your welding iron or hot air blower!
That said, the best fix for a hole is to smooth out and simplify the edges, get a material/color patch cut to size, perhaps add wood supports to the underside of the hole edge and glue/weld the patch into place. This might require some professional expertise and may very well leave your boat severely scarred for life - so you better have a good story ready.
"Glass” Cloth Construction Kayak Repair
Shallow scratches can be accepted as is, others can be lightly sanded and/or simply coated over with resin/gelcoat. Deeper scratches should be cleaned and in some cases further routed out a bit to provide a more uniformed bonding area for filler adhesives.

It is generally best to mask off the area immediately around the scratch with blue paint trim tape, clean and even slight abrade the surrounding area before applying the repair coating.
TIP: (1) If you’ve taped around the repair area when using epoxy resin to coat over a scratch, remove tape while epoxy is still tacky to the touch, or else your new “repair” will be trying to remove hardened tape from your deck.
Full hull-breaching cracks in fiberglass, wooden and thermoform boats is significant damage. In the case of the fiberglass/thermoform boats, I’d suggest checking with a boat marine repair shop for the former, and with the manufacturer for the latter.
Thermoform Kayak Repair

The adhesive/resin used to patch Thermoform surfaces can be used either as a scratch filler or as the fiberglass cloth binder when used to repair damage from the inside of the shell. Eddyline’s website recommends Devcon Plastic Welder for both types of repairs. The particular application follows the routine for filling in most cuts and scratches as well as layering cloth to repair larger/deeper damages.
Inflatable/Folding Kayak Repair
Basically most inflatable kayaks and rafts are made of either a synthetic rubber (that used to be called hypalon), or vinyl (PVC). The term “hypalon” is now history. That basically same material, chlorosulfonated polyethylene (CP), is what most kayak hulls would be made out of today. Newer Feathercraft hulls were made of urethane. “AquaSeal” can be used to fix urethane material; rubber cement works on hypalon.
Klepper recommends using clear “Gorilla” tape for temporary field repairs on their cotton decking material (they offer a supply of the different colors of their cotton/canvass deck material). They also suggest a fabric adhesive (Tear Mender). More serious and long-lasting deck repairs may have to be sewn at a canvas/awning shop with commerical sewing machines.
In either case, hull repairs are basically like fixing a leak in a bike inner tube. Abrade and clean the area around the leak, apply some goo, slap on and press down a patch and - voila! - you’re good to go. Deck patches are probably best glued in place, using a silicon-based, waterproof compound (again, for most water-related repairs, AquaSeal is a great, all-around patch kit staple).
TIP: My personal method for repairing a cloth deck (typically cotton/Klepper or Cordura/Feathercraft) would be to glue a patch over the damage and then also hand-stitch it on (with a curved needle) and then run a bead of AquaSeal along the sewn seam. I think that would work for at least a solid temporary fix that is more likely to stay in place than just gluing.
General On-Water/Shoreside Quick Fixes

Typically most damage while on the water first manifests itself as a small leak; water slowly collecting inside the boat. Most often these are caused by either a sharp, piercing impact that completely penetrates through the hull or a deep abrasion that breaks through the inner surface of the hull. Oftentimes these are along the bow or stern keels or directly under the seat in the cockpit. A quick fix on shore can be as simple as a piece of patch tape or even underwater-curing, two-part marine exopy putty.
TIP: Michael Gray, whose Uncommon Adventures paddling tours uses kayaks in a variety of environments all over the world, says that weather seal tape is a better choice than duct tape for quick sealing holes and other leaks in a kayak.
I’ve used both methods and they each work quite well, at least to get you back home or into camp for the day where you can do a better fix. Both tape and putty can actually be used for on-water repairs - literally accomplished by hauling up the damaged boat onto a “rescue” boat in the classic “T-Rescue” formation and completing the repair. In the case of the putty, it can be worked and applied underwater, perhaps while floating in the middle of a bed of seaweed. It sets in about 20 minutes!
________
I always considered my first scratch on a new kayak as an inevitable Rite of Passage, the field christening of a new hull. It’s up to the individual to determine for themselves which blemishes are merely cosmetic and which actually compromise the integrity of your boat. Anticipating what damage you might experience based upon the type of paddling environment you’ll be in, and what repairs you might be forced to make, should at least be on your check list when choosing the type of material you want for your kayak.
___________________________________________________________________
Special thanks to: Alain Cacchione/Pelican Kayaks; Gerald Grace/Klepper America; Michael Gray/Uncommon Adventures; Wayne Horodowich/University of Sea Kayaking; and these manufacturer’s websites - Eddyline / Chesapeake Light Craft / Pelican / Pygmy / Stellar - for information.
Related Articles
Have an extra piece of plywood hanging around the house? Build a canoe with it!

Using just bark, sticks and twine, these two craftsman build an impressive bark canoe with traditional…
Learn how to install a fish finder on your fishing kayak without compromising your yak by drilling holes…
Learn how to build you very own Kayak Cart for just $25 plus some assembly time and be ready to roll…