TX-Recovery
The TX-Recovery, like the "T" or the "HI" recovery, is named for the configuration used when draining the water from the kayak after the paddler has done their wet exit. If the paddler is not concerned about exposure, draining the water saves a lot of pumping time. The TX draining method was originally developed because the early kayaks did not have bulkheads so water had to be emptied from the fore and aft ends of the kayak.
The concept is simple but the execution is physically demanding. By having the flooded kayak upside-down and centered over the upright kayak you can teeter totter the kayak up and down so the water going back and forth to each end of the kayak passes the open cockpit and drains out through the opening. Rocking the kayak three or four times will empty the kayak sufficiently.
Now that bulkheads are standard on most kayaks the TX draining method is not often used. If you were to lift the stern instead of the bow during a T-Recovery then you would need to do a TX drain. With a rear bulkhead enough water drains just by lifting the bow.
I can recall having to do a TX-Recovery on a completely flooded Chinook kayak that did not have any bulkheads or float bags or deck lines. If I did not have my tow rope attached to the bow grab loop the kayak would still be on the bottom of the lake. It took all of my strength and experience plus the assistance of the paddler in the water to get the water out. In the process my top deck collapsed (over my thighs) due to the weight of the water in the kayak. Keep in mind the only water remaining in the kayak at that time was in the rear half.
When a kayak is completely flooded it is very difficult to manage. The curl method gets some of the water out before you try the TX drain. The real message here is "have water tight bulkheads or at least use float bags when you venture on to the water."
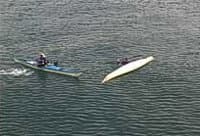
I always recommend going to the bow of an overturned kayak. Even if there are no bulkheads you will be avoiding a rudder if the kayak is so equipped. In addition if there is only one bulkhead it will probability be a rear bulkhead.
Once in the T position secure your paddle so you have two hands free. Direct your partner to assist as you need it. See the different variations for performing T-recoveries if your kayak has a rear bulkhead.
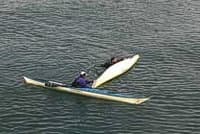
Unless you have previous knowledge that the kayak had bulkheads or float bags you will not find out you need to do a TX drain until after you start the recovery process.
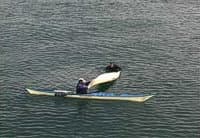
The traditional method for getting the bow of the flooded kayak up on to the upright kayak is to have the paddler in the water jump on the stern of the capsized kayak so the bow pops up. Sometimes jumping on the stern isn't enough. The paddler in the water may have to move to the cockpit area of the assisting kayaker. Then both of them lift the bow of the flooded kayak. Once the bow is across the cockpit of the assisting kayaker he or she can slowly lift the bow so the water can drain out of the kayak through the cockpit. This gets out half of the water.
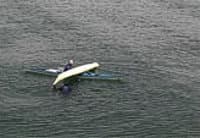
The difficulty is getting the second half of the water out. Trying to get the flooded kayak over the assisting kayak so it will teeter totter is the most physical part. The paddler in the water needs to be helping as much as they can. Keep in mind it is more difficult to slide a kayak across your deck when it is upside down. There are more rivets and deck gear that can get hung up on your cockpit rim. Sliding the kayak up and taking advantage of the smooth hull or side of the kayak is an option.
Once the flooded kayak is even over the upright kayak it does need to be upside down so the water can drain. The paddler in the water will usually need to help start the rocking motion. As more water drains the easier it is to manipulate the kayak.
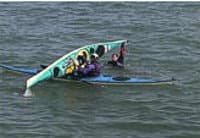
When the water is out of the kayak, turn the kayak upright and slip it back into the water. Turn the kayaks so they are parallel and they are aligned bow to stern.
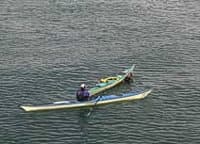
When you have a good hold of the cockpit (for stability) the paddler in the water can use any number of re-entry methods to get back into their cockpit.
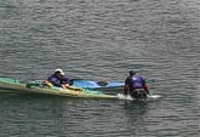
In this particular sequence, the swimmer will do what is called the cowboy re-entry. He gets up on his kayak near the stern where there is less buoyancy so it is easier to climb onto the rear deck. It is more difficult with ruddered kayaks because you have to avoid the rudder. Once up on the kayak the paddler throws one leg over the kayak so he is straddling his kayak.
Notice the recovering paddler keeps straddling his kayak until he gets to his cockpit. While moving toward his cockpit the paddler can hold his spray skirt grab loop in his teeth to keep it from getting caught under his groin area. Keeping your legs pointing out will make you feel more stable as you move along the deck of the kayak. This is the re-entry method commonly used in the scramble recovery. The only difference is you are alone and no one is holding your kayak so you have to balance to stay upright. Pointing the legs out helps with the balance. If you wrap your legs around your kayak it is easier to tip it over and thus creates more work for the person trying to stabilize your kayak.
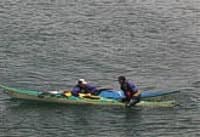
When you reach your cockpit place your feet into the cockpit and slide into the cockpit. Once your backside touches the seat which means you lowered your center of gravity you will feel more stable and you partner's job gets a little easier.
Remember, the stabilizer does not let go of the kayak until they are told to let go. Your partner may still be depending on you to stabilize their kayak even though you think they are ready. Always be explicit when you intend to let go of the kayak.
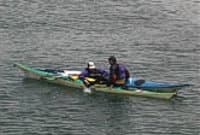
In this age of bulkheaded kayaks it is difficult to feel what it is like to do a TX drain on a fully flooded kayak. As a partial practice I recommend flooding the cockpit as mush as you can and try doing the TX drain by pulling the stern up first. At least you will feel what it would be like with the water that is trapped in the cockpit. Be careful around rudders.
If you have an old kayak and you can afford to knock out the bulkheads it can be used as a great training tool for club practices in doing TX drains or HI drains. Don't use your lightweight paddles for a real HI drain if the kayak has no bulkheads.
I recommend you attach a tow line on the kayak if there are no bulkheads during the practice session. It would be a shame to loose the kayak. You will also become a true advocate of deck lines if you ever have to do a real TX on a kayak that doesn't have deck lines.
If you could not do the TX because the kayak is too heavy to manage then you may wish to consider a re-enter and pump. If you and your partner both pump it will make the job easier.
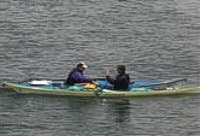
If you do have a kayak without bulkheads I highly recommend getting large float bags and/or a sea sock so you make everyone's life a lot easier in the event you capsize. As always, regularly check the water tight seals on you bulkheads and maintain as needed.
Pictures seen above were taken from the USK Video Capsize Recoveries & Rescue Procedures
Wayne Horodowich, founder of The University of Sea Kayaking (USK), writes monthly articles for the USK web site. In addition, Wayne has produced the popular "In Depth" Instructional Video Series for Sea Kayaking.
Related Articles
If you're new to paddle boarding, in 5 minutes you can get the tips you need to get out on the water…
Dungeness Spit from above, with the New Dungeness Lighthouse in the distance Dungeness…
Boat Bump The boat bump is primarily a river rescue technique. It is used to push canoes into eddies…
If you're going to hit the water on your own, you need to be comfortable with some self-rescue skills.…

